How to build a multilingual WordPress site - video training

To help WordPress developers who are new to building and maintaining a multilingual site, we recently launched an educational video series “How to build a multilingual WordPress website” that provides step-by-step instructions. We also created this blog post to give you a comprehensive overview of the process. Feel free to dive in from the top, or use the table of contents below to jump to where you need the most support.
How to build a multilingual WordPress website
Multilingual websites are imperative for businesses expanding into new, global markets. But how do you develop one that’s set up for professional translation and is easy to maintain?
Step 1: understanding terminology
Let’s start with the two most important concepts for multilingual websites. Think of these as the building blocks or foundations that allow a website to run properly even before considering translation.
Internationalization (I18n)
Internationalization is the process of using code, PHP in the case of WordPress, that allows a site, theme or plugin to be translated.
Internationalization is often abbreviated I18n, because there are 18 letters between the “I” and the last “N” in the word internationalization.
It’s worth clarifying: Internationalization is not actual translation. It’s simply part of the foundation of a multilingual website that sets the stage for future translation.
For more information on internationalization, watch our video series above. You can also visit WordPress to explore the theme handbook, which includes a helpful section on internationalization as well as internationalization for plugins.
Localization (L10n)
Just like internationalization, localization has an abbreviation: L10n. And just like internationalization, the 10 represents the number of letters between the “L” and the “N” in the word localization.
Localization is the process of making sure that content or a product speaks to a specific market or location. Unlike internationalization, localization isn’t driven by developers. Once a website, theme or plugin is built properly, which yours will be after reading this website-building series, a localization expert guides the process. WordPress has excellent documentation for localizing websites, including themes and plugins.
Later in this blog, we will discuss the WordPress Multilingual Plugin (WPML), one of the most widely used translation plugins available for WordPress. For now, know that internationalization and localization are two vital concepts that you need to understand for a successful multilingual WordPress website.
Now that you’ve learned the basics behind a multilingual WordPress site, let’s continue by picking a translation-ready WordPress theme that’s perfect for your brand.
Step 2: choosing a translation-ready theme
Choosing a translation-ready theme takes a little bit of digging, since there are literally thousands of options. It’s important to make sure the theme you choose is suited to your needs.
Let’s walk through the steps to find the right multilingual theme for your brand.
Not All Themes Are Created Equal (Even Those That Say They’re “Translation Ready”)
Option 1: free themes
Everyone loves to get something for free. When it comes to free WordPress themes, we’ve found many that work beautifully for multilingual sites. You just need to know what to look for.
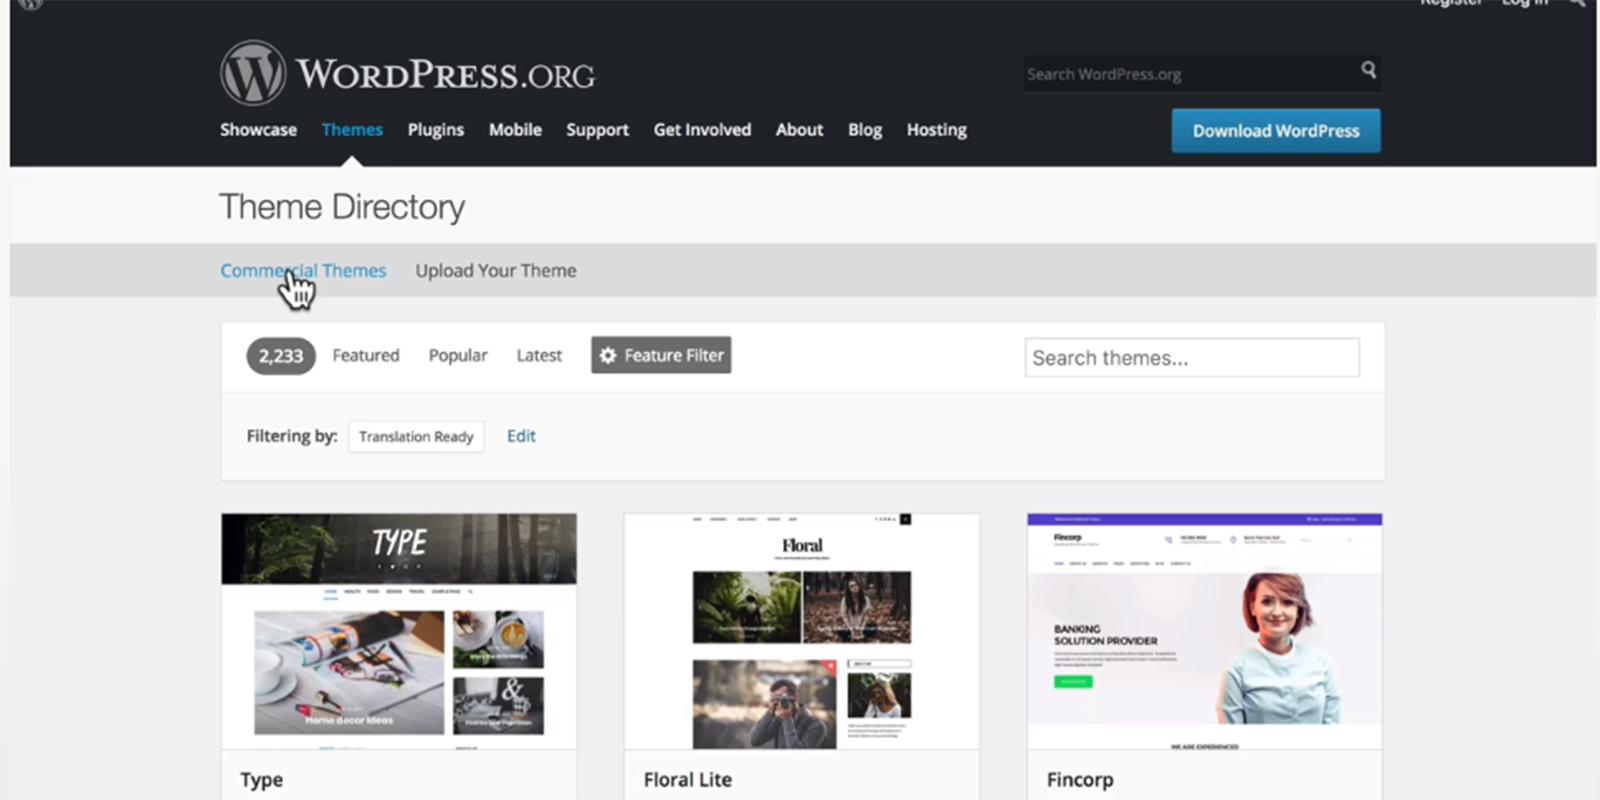
The first step is to filter out the themes that you don’t want. To do so, go to WordPress and click on the “Themes” button in the top navigation bar.
Once there, you could scroll through all the themes, but you can save time by adding filters to narrow down your options.
To add filters, start by clicking on “Feature Filter” (next to the gear icon). The box you’re looking for is at the bottom of the center column: “Translation Ready.” Click on that box, and then click “Apply Filters” at the top of the page. While you’re there, feel free to click on any other filters that make sense for your brand and website needs. But keep in mind, the most important feature is that a theme is translation ready.
With that, we’ve narrowed down the thousands and thousands of WordPress themes to just a few thousand. Just over 3,500, to be exact. Warning: Scroll at your own risk. The themes just keep appearing.
Because you know your brand best, the choice of the theme is up to you. Look through the options and pick the best theme for your brand, depending on navigation, design, appearance and other factors that are important to you. Be careful, because many themes say they’re translation ready, but not all of them actually are. How do you know if the theme you’ve chosen is translation ready? It’s easy!
Click on the theme you want, and scroll down to the section titled “Browse the Code.” There, you’ll see the “Subversion Repository” link. Go ahead and click on that link.
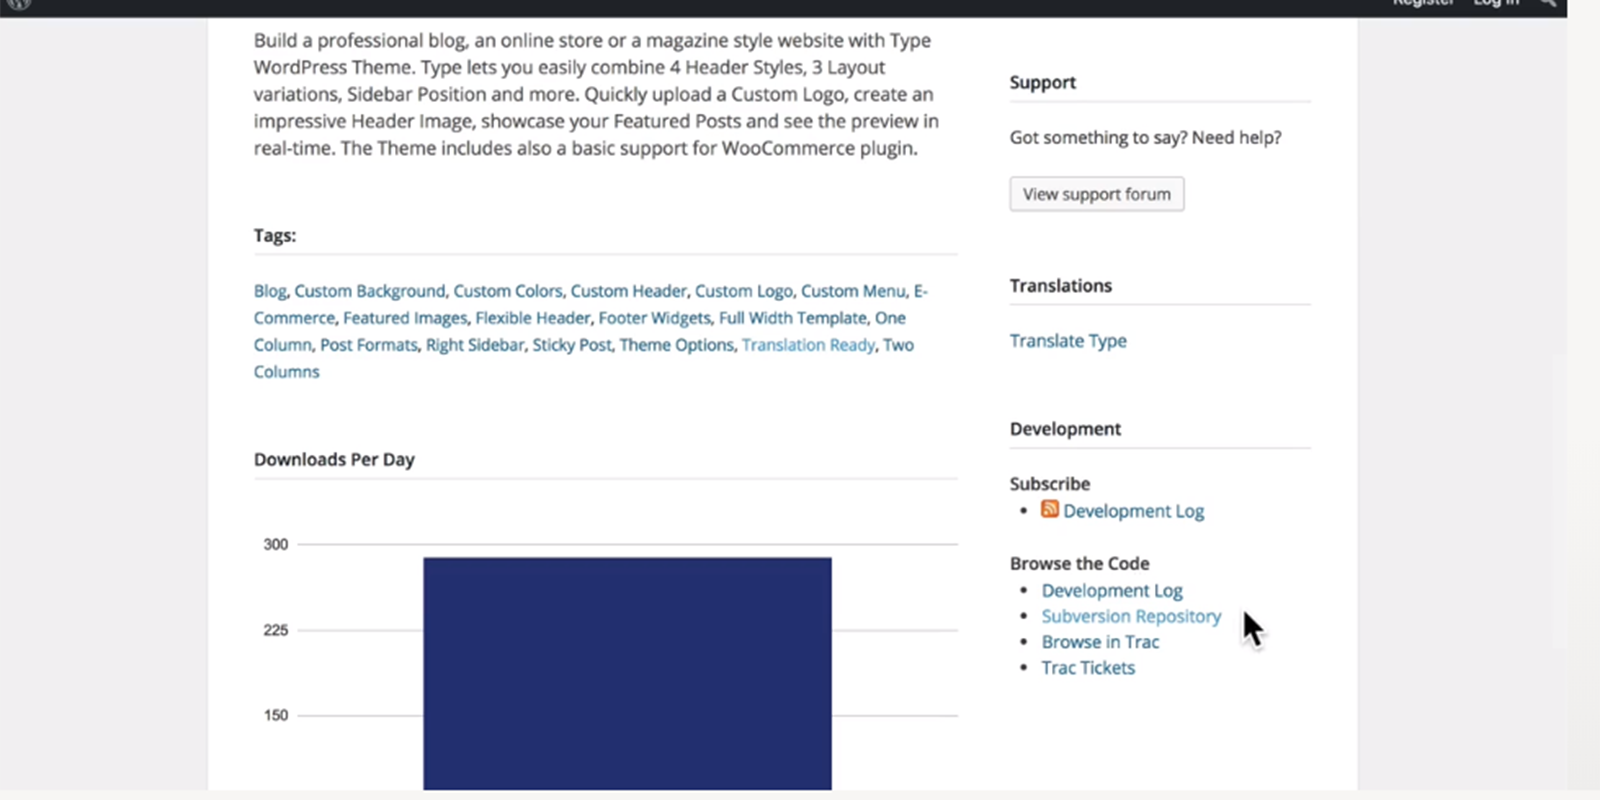
That link will take you to a page listing all versions of the theme. The latest version, and the one you’re looking for, is the last link in the list. Click on that link, which takes you to yet another page with more options listed. Find “Style.css” in the alphabetical list, and click on it to download the code behind the theme. Now, there’s just one final step. Look for “Text Domain” in the code, either toward the top or by searching for it on the page. If you find “Text Domain” in the code, the theme is, in fact, translation ready. If you can’t find it, move on to your second-favorite theme.
Option 2: commercial themes
Looking through commercial themes is a bit harder than searching WordPress’ free themes, because you’ll see different companies presenting the themes they’ve developed. However, there are common features that you’ll see in both free and commercial themes.
First, find a theme that catches your eye. Click on the link, and read the detailed information about the theme. If it says “Ready for Translation,” you’re all set.
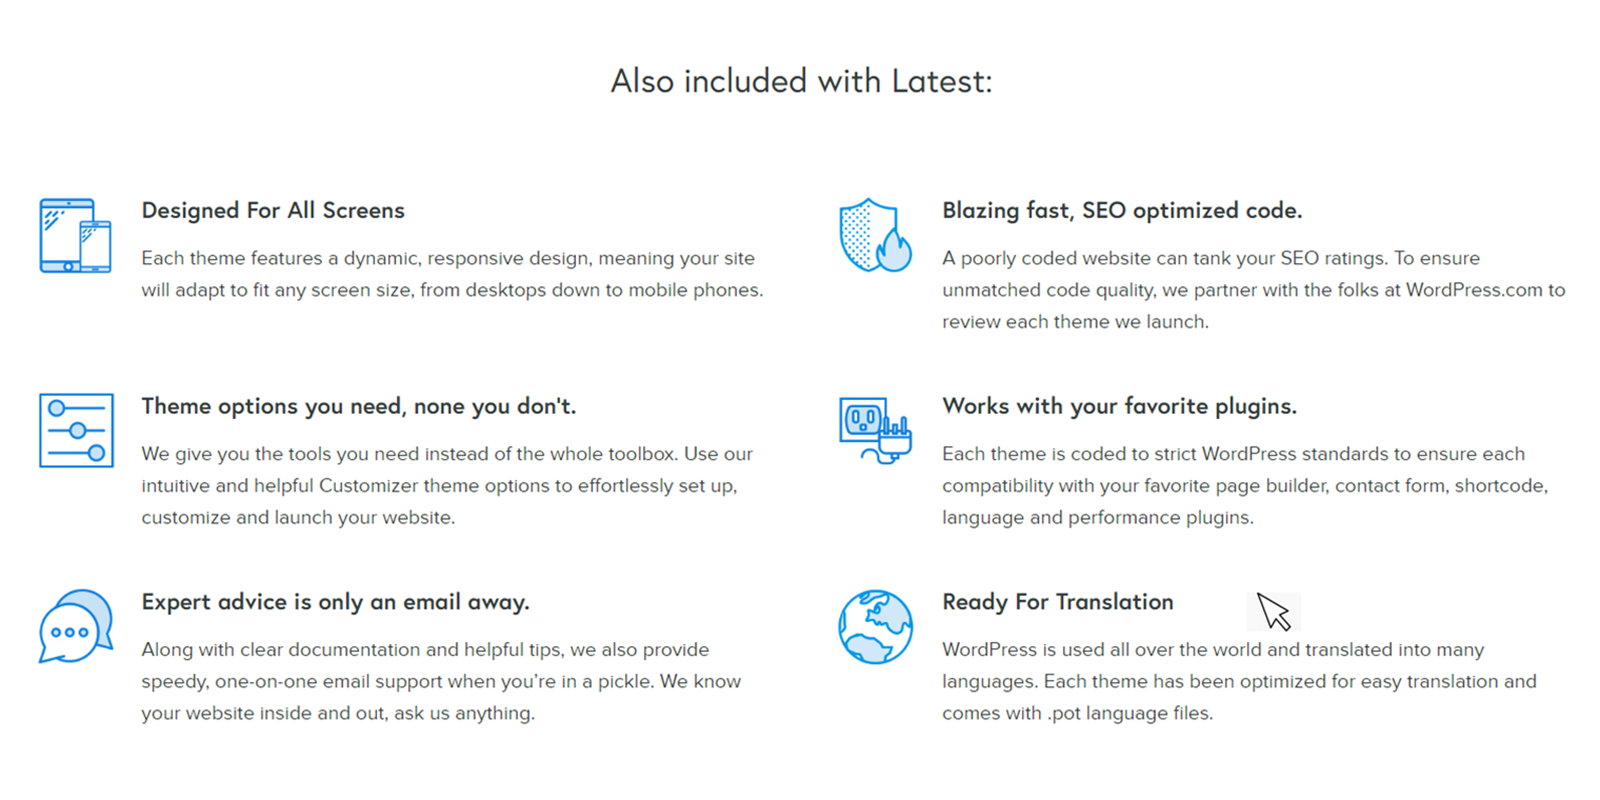
It’s a good start if a theme claims to be translation ready. But, you should double check to make sure. In the example, the theme says “Ready for Translation,” but it goes one step further. The description shows the theme has been optimized and comes with “.pot language files,” which means it’s truly translation ready.
The lesson? Search for themes that are both “Ready for Translation” and include keywords such as “.pot” and “.pot language files.”
Trial runs and testing
The great thing about free themes is that you can download them and try them for yourself. If one doesn’t work, you can get rid of it. No harm done.
However, for commercial themes, you should check the terms and refund policy. Some companies ask you to join a club before taking care of any needs you have — just in case the theme doesn’t translate as promised.
If you’re buying a single commercial theme, ask whether or not the provider will offer a refund if the theme doesn’t work as expected. It’s wise to get that guarantee in writing. If there’s a good refund policy, then download the theme and see if it works as advertised.
You can find a great theme, either free or commercial, that works for your brand by following the simple steps outlined above. First, search for the theme. Next, check to make sure it’s translation ready. Finally, test the new theme.
Step 3: introduction to WPML
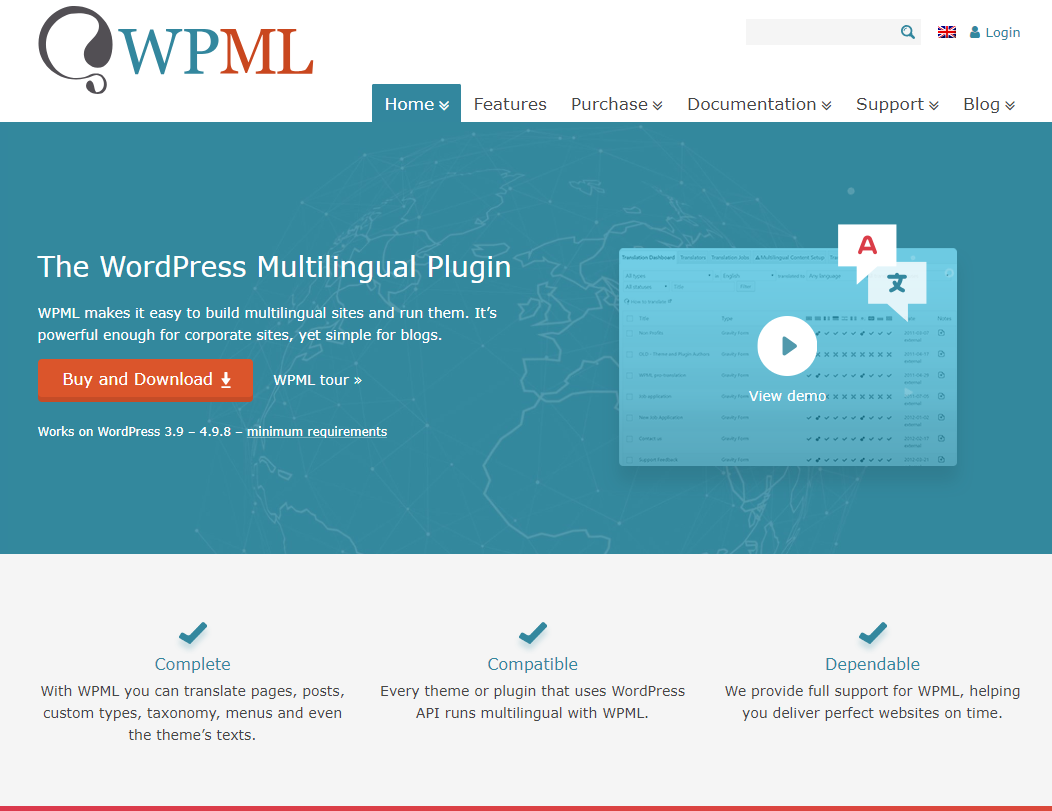
The WordPress Multilingual Plugin (WPML) is widely popular because it’s proven to work. It’s easy to use and is not theme or plugin dependent. Right out of the box, it’s ready to go. With a single WordPress installation, WPML provides a comfortable, familiar interface for finding texts in one language and translating them into another language.
To familiarize yourself with the plugin, visit WPML. If you scroll to the bottom of the page, you can see the languages this website has been translated into. That’s in addition to the fact that WPML can host translated content in more than 40 languages.

Now, head to the “Features” section of the website, where you’ll be faced with an important product choice.
Choosing the best WPML version for a WordPress website
There are two versions of WPML: Multilingual Blog and Multilingual CMS. We highly recommend the CMS version, because it offers many additional useful features for the price, particularly translation management capabilities.
Each translator on your site can get their own workflow through Multilingual CMS, so you can have multiple translators working at the same time. This way, you can keep your processes clean and improve translation time.
The CMS version can also translate the theme and plugin texts. Usually, they’ve already been translated. Sometimes, they haven’t been translated, like when making a custom WordPress theme or plugin. In that case, you can choose to have WPML translate the content for you. Overall, Multilingual CMS is a better choice, because it offers many options to increase the functionality of a WordPress site. Yes, it costs more money, but your time is valuable and the savings there are worth it.
Take advantage of integrated professional translation
Let’s say you need professional translation help after your site’s up and running. Do you really want to give a vendor complete access to your website? With WPML, you don’t have to.
WPML comes with integrated professional translation. This makes it easy to give a translator access to the text on your website without requiring access to the entire site (no passwords or IT headaches). This also eliminates the manual workflow of having to email a ton of files back and forth. It’s secure for your company and efficient for your team.
Never underestimate the power of expert support
Translating a website is a substantial project with buy-in from people at all levels of your organization. The broad support is great, but it also means your management team is watching. You need expert guidance available to keep your program moving at all times. WPML is there to provide support six days a week, 19 hours per day and in nine languages. That’s peace of mind.
Having an experienced team on call – whether it’s for customer support or development help – is a no-brainer when creating a multilingual WordPress site. Of course, you can also take the stress out of the process by partnering with experienced translation professionals. Acclaro offers substantial experience in content translation and even developed a WordPress translation connector to increase efficiencies.
Now that we’ve given you an overview of WPML and how it can benefit a Multilingual WordPress website, let’s look at how to install it properly.
Step 4: installing WPML
Installing WPML is a bit different than installing a normal WordPress plugin. Even if you’re a WordPress plugin guru, you’ll want to take care to make sure you install WPML correctly.
Don’t forget the add-ons
To start the installation process, you’ll need to visit WPML and click the orange “Buy and Download” button. Once you’ve purchased WPML, you can revisit the site and log in with the link in the top right corner. Then, go to your website’s WordPress dashboard, scroll down to “Plugins” and click “Add New.”
This example shows four different add-ons from WPML.
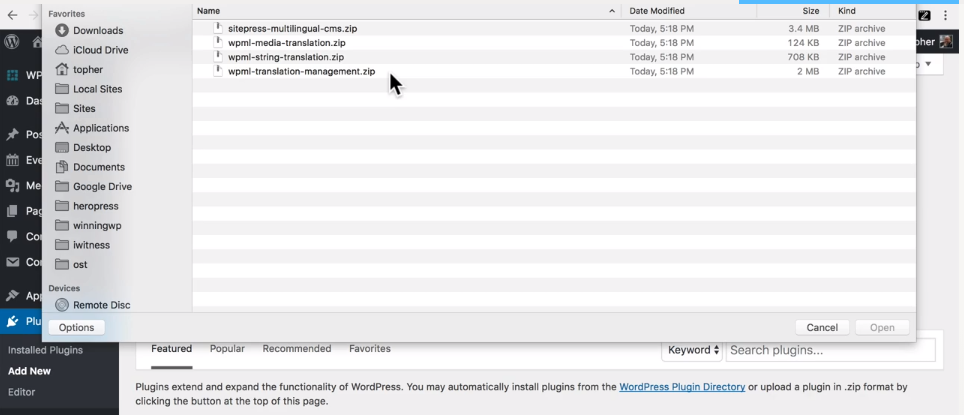
The add-ons include “sitepress-multilingual-cms” (the main WPML plugin), “media-translation,” “string-translation” and “translation-management.” We’ll go over each of these add-ons, but you’ll need to make sure you install more than just the main WPML plugin. The add-ons are very important to the functionality of a website.
Let’s install plugins
Now that you have the main plugin and any add-ons downloaded, click “Install Now.” Once the main plugin installs, don’t click “Activate Now.” To save time, return to the installer and install each add-on. Then, go to the “Installed Plugins” page and click the “Inactive” tab.
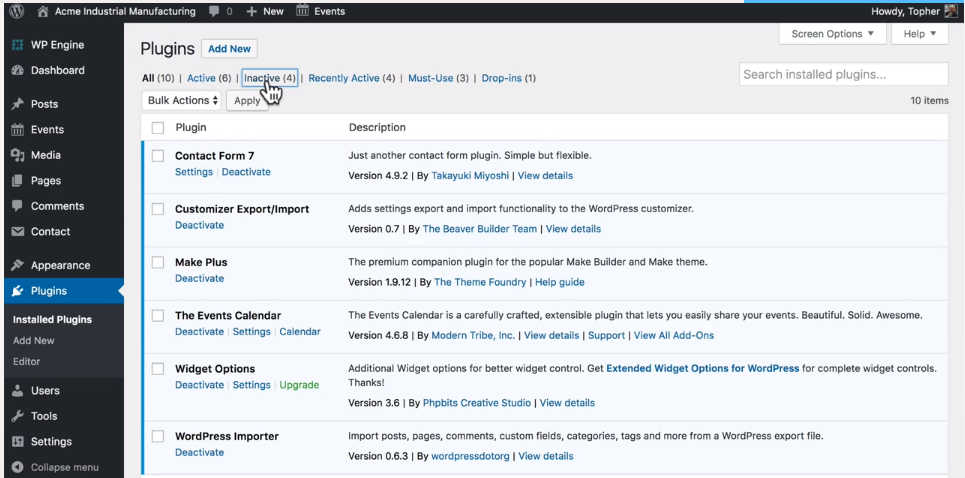
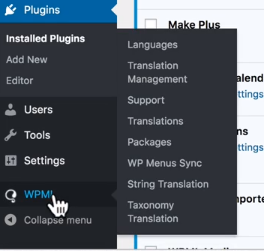
From here, you can activate all of the plugins at one time. And with WPML installed on a WordPress site, you can see the “WPML” button at the bottom of the WordPress menu.
WPML translation nuts and bolts

The first thing you should do is go to “Languages,” and scroll down to the SEO section. You may have heard that Google looks down on multiple versions of a website, but this is not the case with multiple languages. When you get to “SEO Options,” make sure the box is checked. The earlier Google can see you have multiple languages on a site, the better off you are.
You’ll also notice an option to show that WPML is doing the translation. It’s up to you whether or not you want to do this; it’s just free advertising for WPML.
There’s also an option to store a language cookie for AJAX, which is there to help with e-commerce functionality. If that’s in your plans, you’ll want to check the box.

The next section deals with “Translation Feedback,” which is a relatively new feature for WPML. It allows a website’s visitors to offer feedback specifically about translation quality. Depending on your brand and website monitoring administration, this may come in handy.
Once you’ve taken care of all of these steps, go back to the top of the “Languages” page and choose a language.
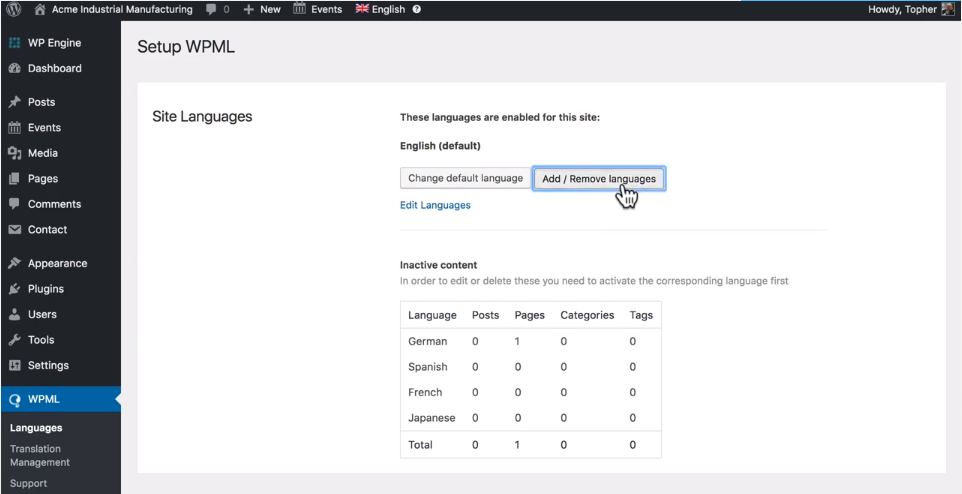
And now for the best part: Language options! This is where you choose any language you’d like to translate. Here are all the different languages that can be used on your website. Once you select the language, you’ll notice there are many options on the page that weren’t there before. Adding Spanish, for example, results in more than 10 new options. Luckily, you’ll notice convenient links at the top of the page, which jump right to those sections.
Now that we’ve covered how to install WPML, we’ll take a look at how WPML enables translation on your website.
Step 5: translating content with WPML
Let’s jump right into the content translation process. The best way to learn quickly is by manually translating content through WPML.
Manual translations should always be bite-sized pieces of text, like a sentence or paragraph. If you’re planning to translate complete articles or pages, you should leave that to translation tools and translation experts like us.
We aren’t suggesting you manually translate substantial amounts of copy, but it’s a good exercise to learn how to translate content manually. It helps you get comfortable with the ins and outs of the system, and it can come in handy when you’re in a pinch.
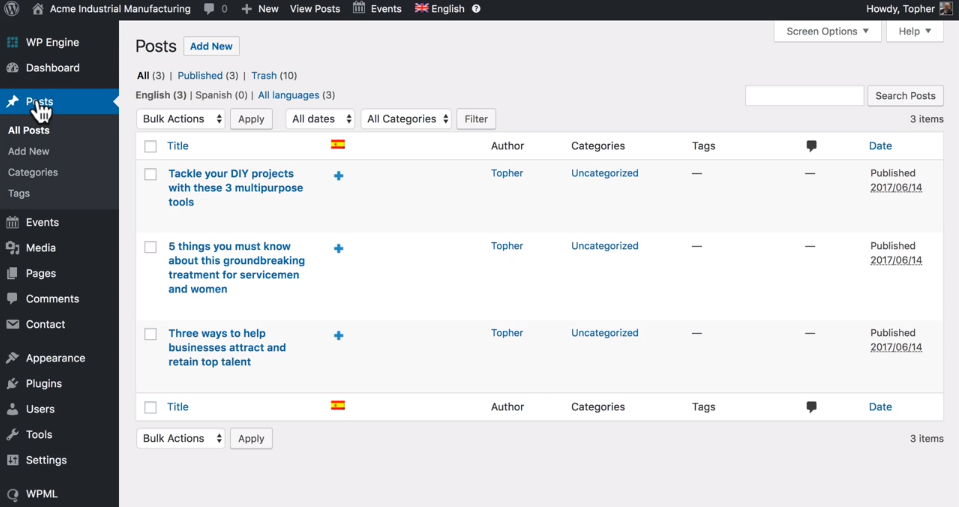
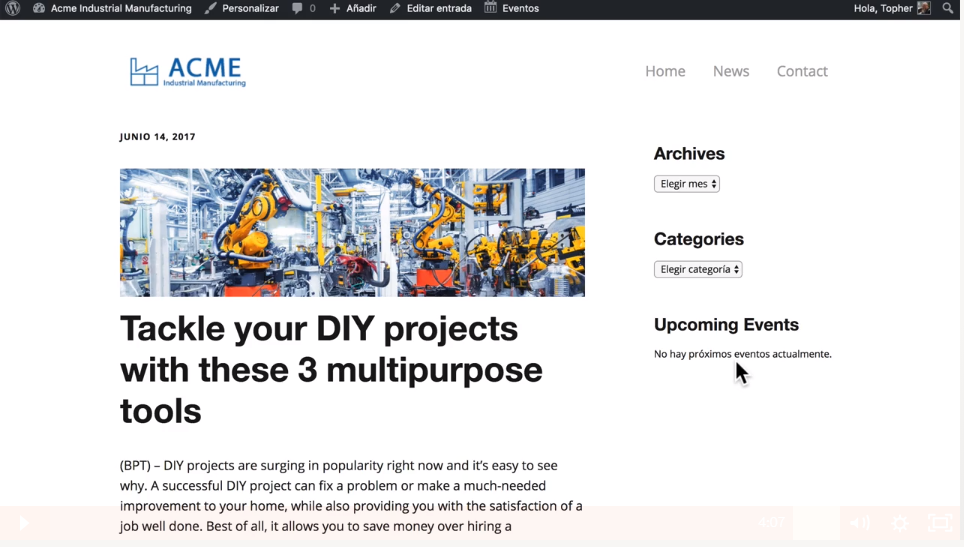
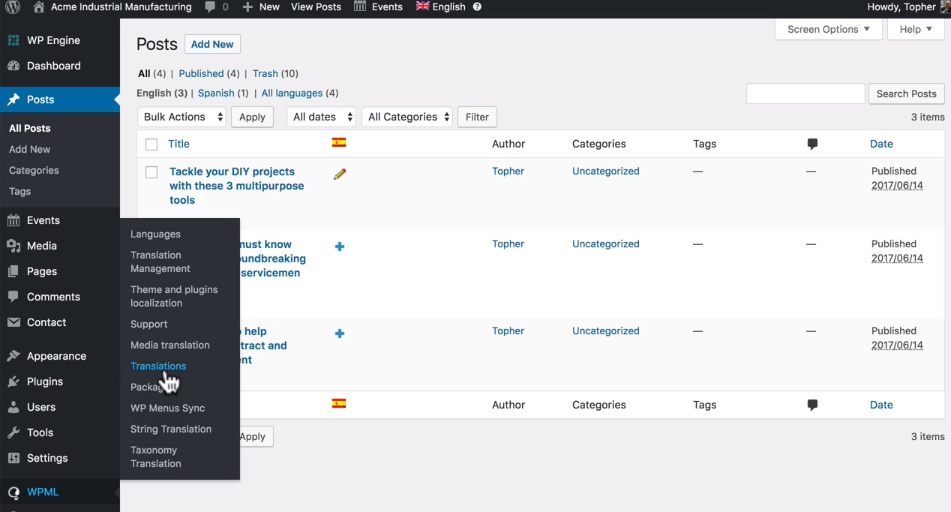
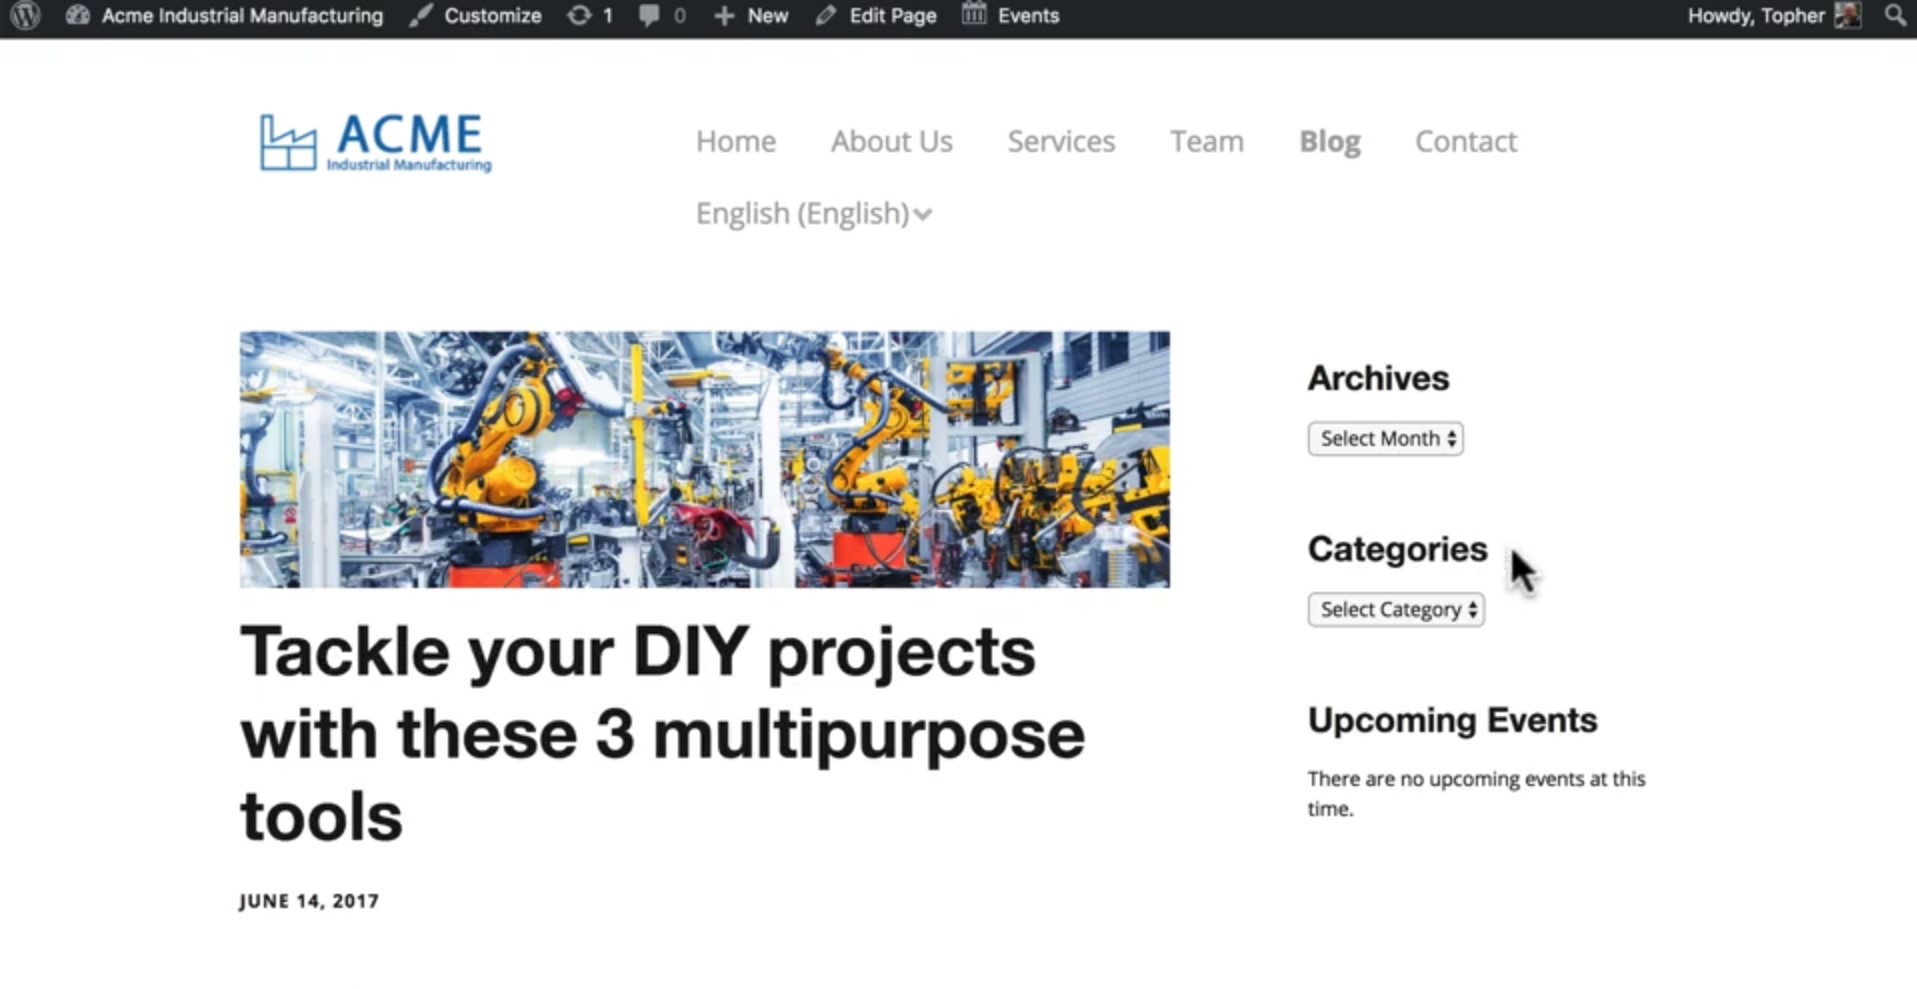
Let’s use “Posts” as an example. Next to the title of each post is a small plus sign in a column underneath the Spanish flag, letting you know the post can be translated to that language. It’s a simple, powerful visual cue to help you see what language is the default translation language.
However, we suggest you skip the “plus” sign and edit the post instead. It gives you many more options for translation, including duplication – one of our favorites.
The power of duplication
Duplication gives you the peace of mind that all posts have similar content, no matter what language they’ve been translated into. When you’re in the post’s editing window, you’ll see “Translate this Document” in the right sidebar. Here, you can duplicate that article, along with uploaded media and the featured image.
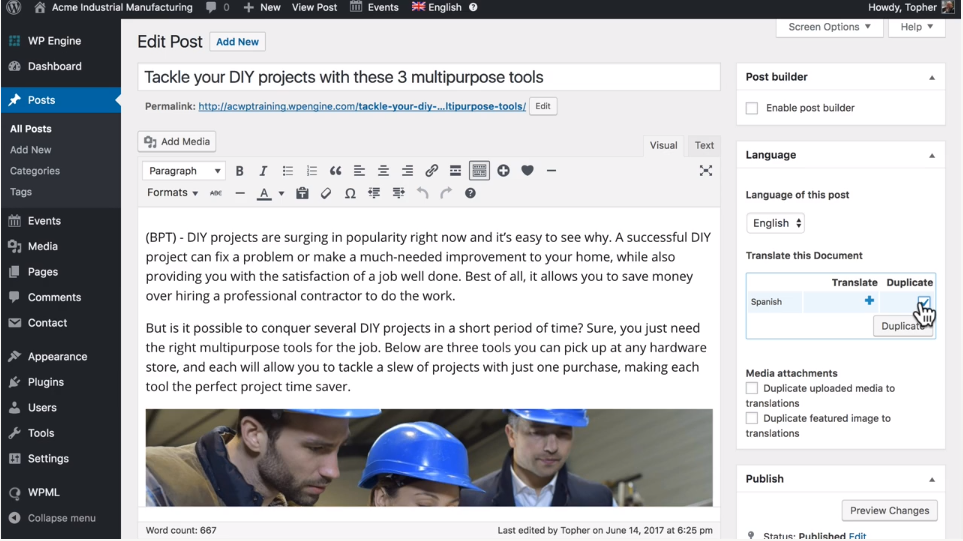
We suggest you duplicate the post each time, so every article is as similar as possible in any language, including both content and images. Once you start manually translating a word or phrase, it’s difficult to keep track of the number of versions, posts and translations. Using the duplicate function provides a good backup in case you need to revert to the original version of a translation.
Now, if you’ve successfully duplicated your post, you may notice it has a “Spanish (duplicate)” version with a pencil beside it. At this point, you’ve only translated parts of the content, like the headings of the template that connect all the posts such as “Archives,” “Categories” and “Dates.” But, you haven’t translated all the content yet.
Time to translate the actual content
There are two ways to translate the actual content of a post from the main “Posts” page of a WordPress website Admin panel.
- Click the pencil by each “translated” post
- Translate the content through WPML
The best method is to translate content through WPML. To edit, simply use the left side navigation in your WordPress admin and click on WPML.
This section of the website is where you and other authors will manage all of your translations. At this point, you still haven’t translated any content yet. You’ve duplicated content, and though WordPress may say the translation is complete, it’s not. The software is good, but it can’t magically translate on its own. You still need to lead it through the final steps.
So let’s get translating! Through the WPML > “Translations” navigation, you can see all the posts. Choose one and click “Edit.”
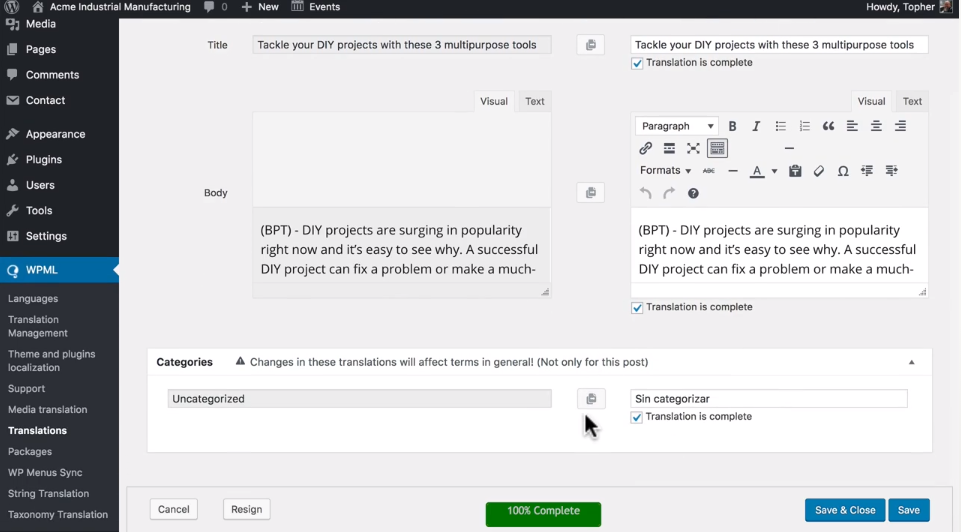
Once you click “Edit,” you can see there are three sections of content to translate: “Title,” “Body” and “Category.”
In this example, you can see the “Title” and “Body” have not been translated, even though the boxes have been checked. The “Category” has been translated, so keep that one checked and uncheck “Title” and “Body.” Once all the text has been translated, click “Save and Close.”
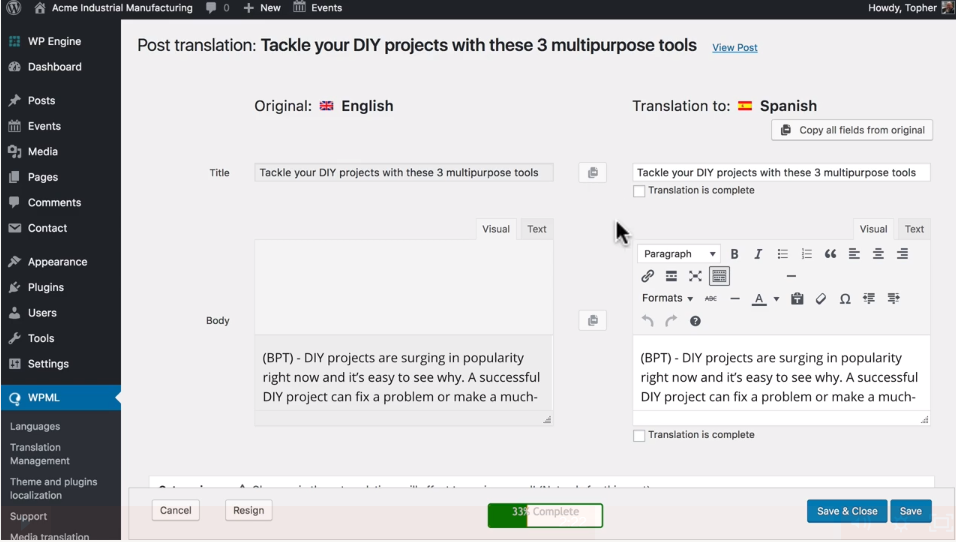
Now you’ve seen the translation page where the actual translation occurs. From here, you can either translate yourself by typing into the fields, or you can hand it over to a professional translator. By clicking “Resign,” you will no longer be in charge of the translation. You officially hand off duties to the next person who logs into your WordPress website.
Better yet, hand the whole thing to a professional translation service that has a translation connector, allowing others to work on translations without direct access to the WordPress admin panel. That allows you to limit the number of people with admin privileges on your website.
With that, you’ve successfully learned how to translate your main content.
But what if you accidentally erase bits of copy? You can get it back by clicking the button beside the area where you lost content, and you’ll revert back to the original content.
Step 6: translating sidebars, menus and more
Now that you’ve learned how to translate content using WPML, you’re ready to tackle translating meta content.
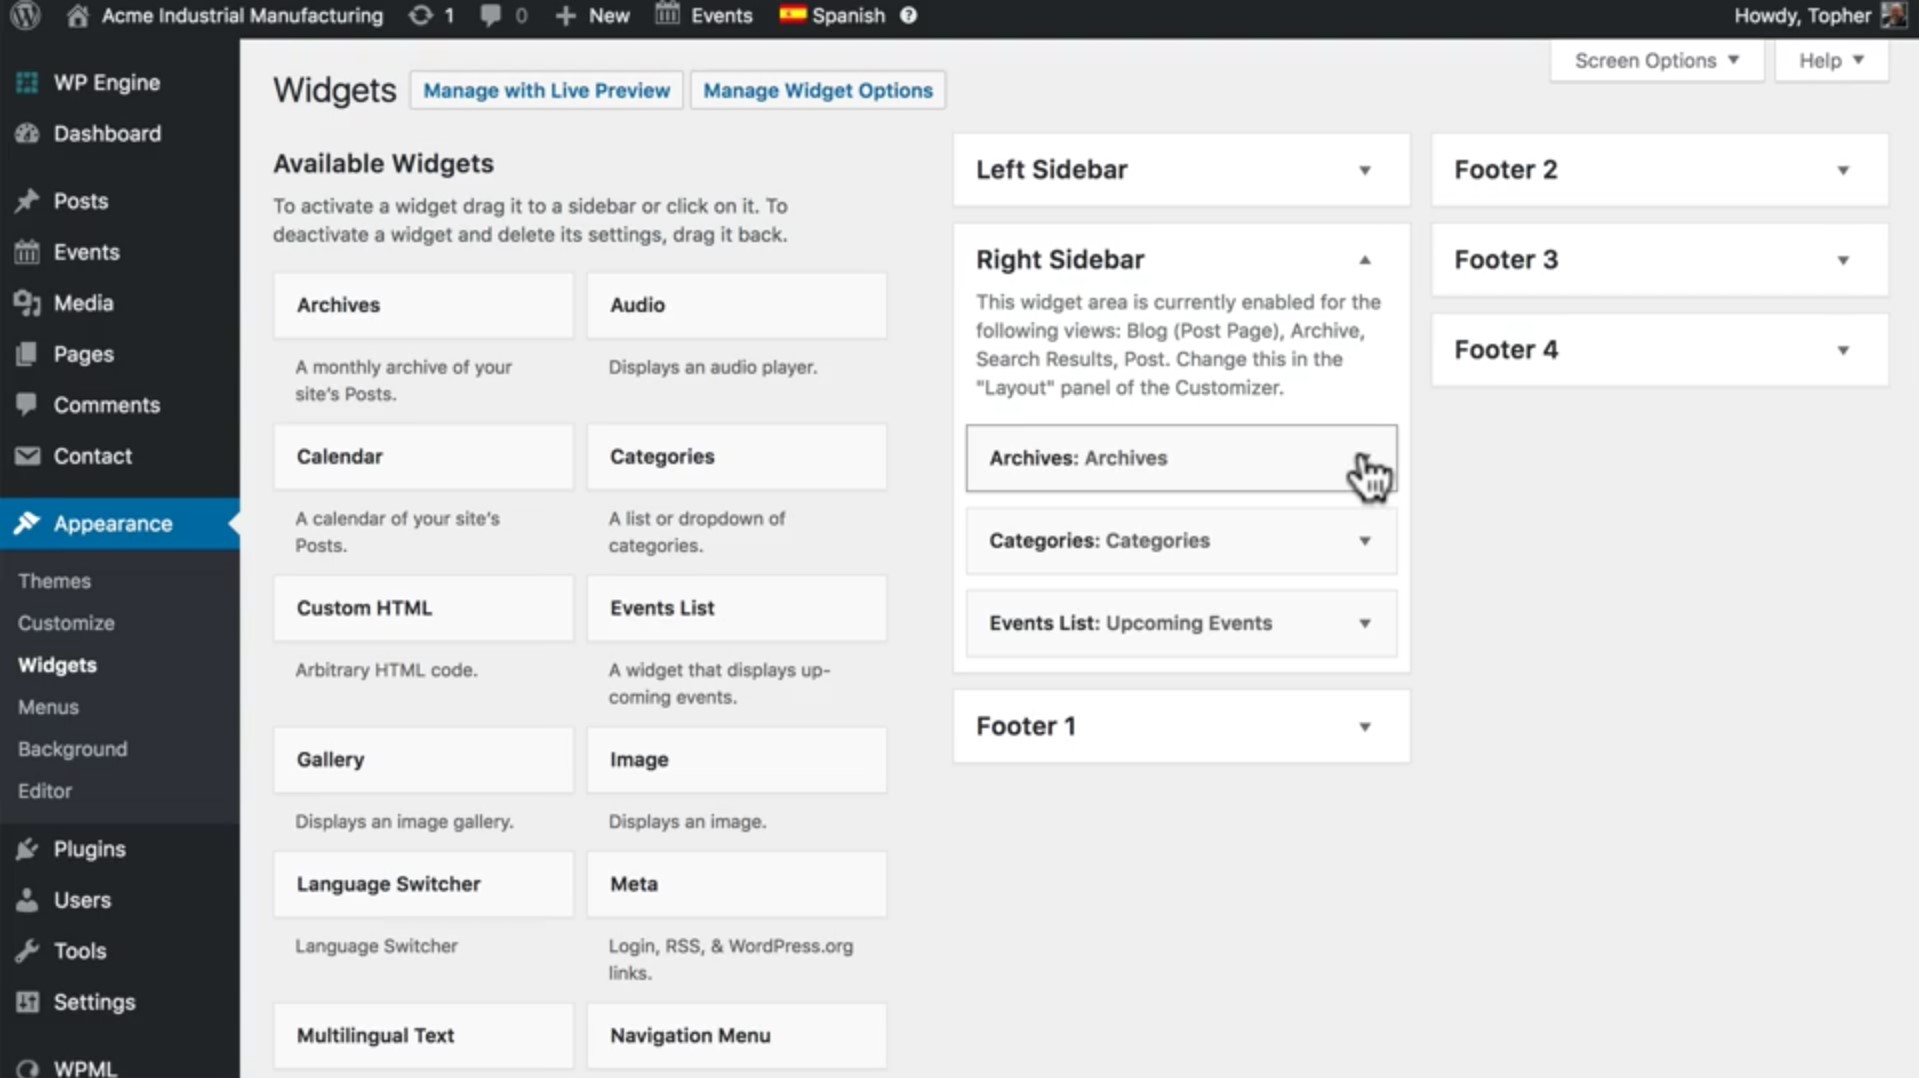
Translating WordPress widgets
In certain WordPress themes, some widgets come pre-translated. If you’re using one of those themes, you can simply click on the supplied language and you’ll get the translation.
However, you may notice the widget headlines aren’t translated. To translate headlines, simply go to the “Widgets” page, which you’ll find under “Appearance” in the left sidebar. Once there, find the widgets you want to translate. Pay attention to the “Title” field, because it’s probably in English. Delete the content in that field, and click “Save.” Translation complete!
Translating WordPress plugins
The instructions in the previous section covered translating widgets. But what if you downloaded a plugin and added that to your website? We can help you translate plugins, too, using string translation.
However, before we start digging into this, you may want to consider using a professional translation partner. String translation is complicated, and any mistakes will be amplified in this section, making them hard to find and fix. Working with a professional translation partner is simple. Find the strings you need translated, export them as a Portable Object file (“.po” extension) and send them off to be translated.
If you’re ready to dive in on your own, we’ll show you how. First, go to the WPML page in the admin navigation, and go to “String Translation.”
“String Translation” is an add-on for WPML, which means you’ll need a WPML license to use it. If you already have one, go to WPML’s website to download it.
Once you have the “String Translation” add-on enabled, you can begin by sorting through your website’s mind boggling number of strings. The easiest way to do that is to search for what you need using the “Search” form at the top of the page.
You can search strings that are thematic to what you want, such as “Widgets” like in the example. Then, you can type in the specific search to further narrow the results.
Once you find the plugin you want, like “Upcoming Events,” click “Translations” and type (or copy and paste) the new translation. One important note: For the translation to appear on the website, you have to click “Save” and mark the box indicating the translation is complete.
Translating menus & navigation
Let’s move on to translating menus and navigation.

There are two ways to translate menus and navigation. You can do it manually or use an automated function.
The manual way
To manually translate menus, go to “Appearance” in the admin navigation, and click on “Menus.” You’ll see the menu structure, and, to the right, you’ll see a Spanish link. Click that link.
Now, you can create a menu name, like “Spanish Menu.” You should see “Translation of Primary Nav.” This is relatively self-explanatory.
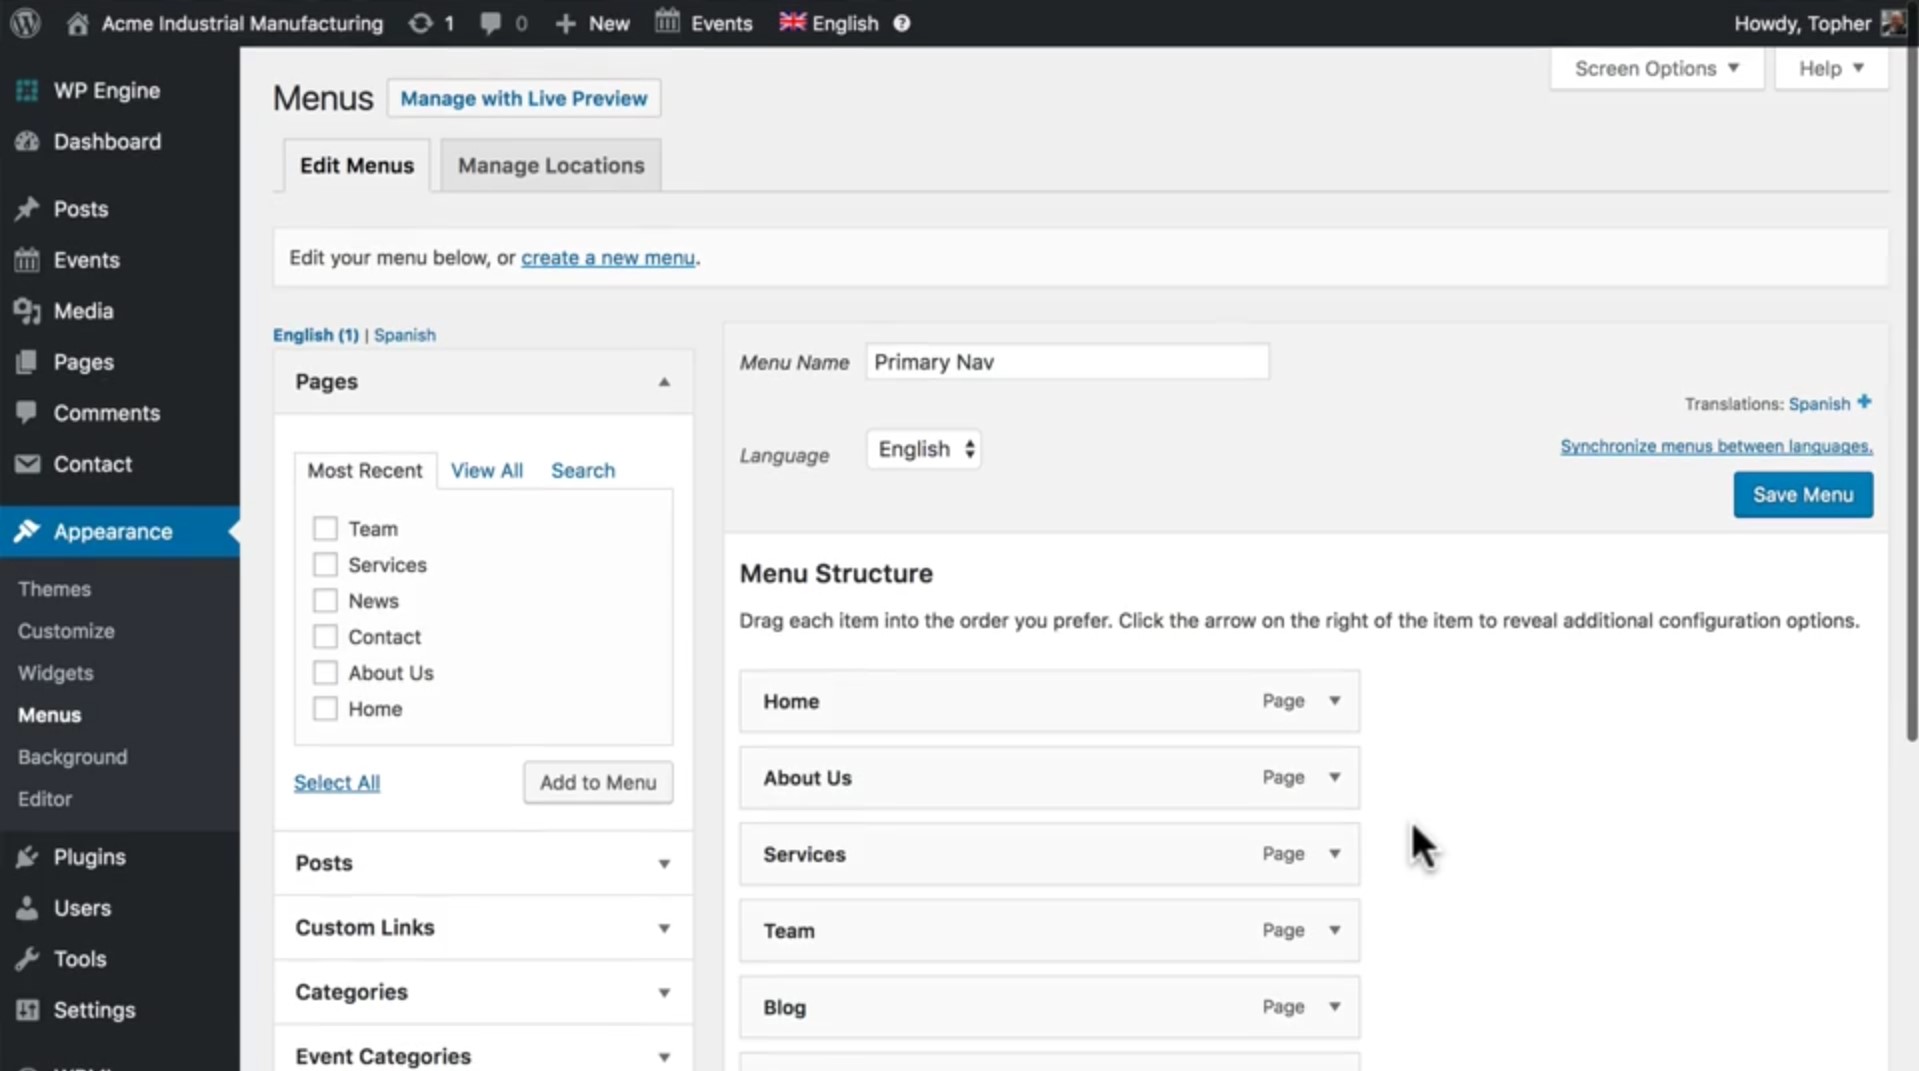
With that, you’ve created a mirror of the English menu navigation. You can now create a menu much like any other menu by selecting the pages you want to connect. The easiest way is to click “Select All” and “Add to Menu.” You’ve successfully translated the English menu to Spanish.
But, if you go to the homepage of the website, the Spanish version of the menu hasn’t changed. There’s a simple fix for that. Go to WPML, navigate to “Languages,” then click on “Menu Language Switcher.” Here, click on “Primary Nav,” then “Save” and you’re golden. Go back to the homepage, reload it and you’ll notice a drop down menu with access to both mirrored menus in English and Spanish.
Next up is the automated process for translation.
The automated way
Everyone wants to learn the automated way, which is faster and easier. However, you’ll need to keep a close eye on changes that are automatically made. To get started, you’ll need the “WP Menus Sync” add-on, which is free if you have a WPML license. You’ll just need to download it from the WPML website.
Now, go to the WPML navigation in the admin section and click “WP Menus Sync.” You’ll see WordPress already knows that the English and Spanish navigation need to be synced. Click “Sync” and you can choose the menu items you want to sync. We recommend choosing “All.”
A quick word of warning: Depending on the page structure, the automated sync may not be exact. Make sure you double check every translation.
Step 7: SEO considerations
The days of “black hat” SEO are mostly over. People may still try to game the system, but it’s rare. Google’s RankBrain technology is better than ever, and it’s not worth it to try to outsmart the algorithm.
With a multilingual website, you will have duplicate content. But don’t worry, because Google is aware of the need for duplicate content where it makes sense for the user. A good example of this is found in multilingual pages.
Luckily, one of the benefits of the WPML plugin is that it does all the work for you, including communicating with Google and letting its algorithm know about the duplicate content. If you have a WordPress website, it tells Google that you have a multilingual website, resulting in multiple versions of the same content in different languages.
WPML, however, does give you options regarding how you offer languages in the URL.
How to build a URL the right way
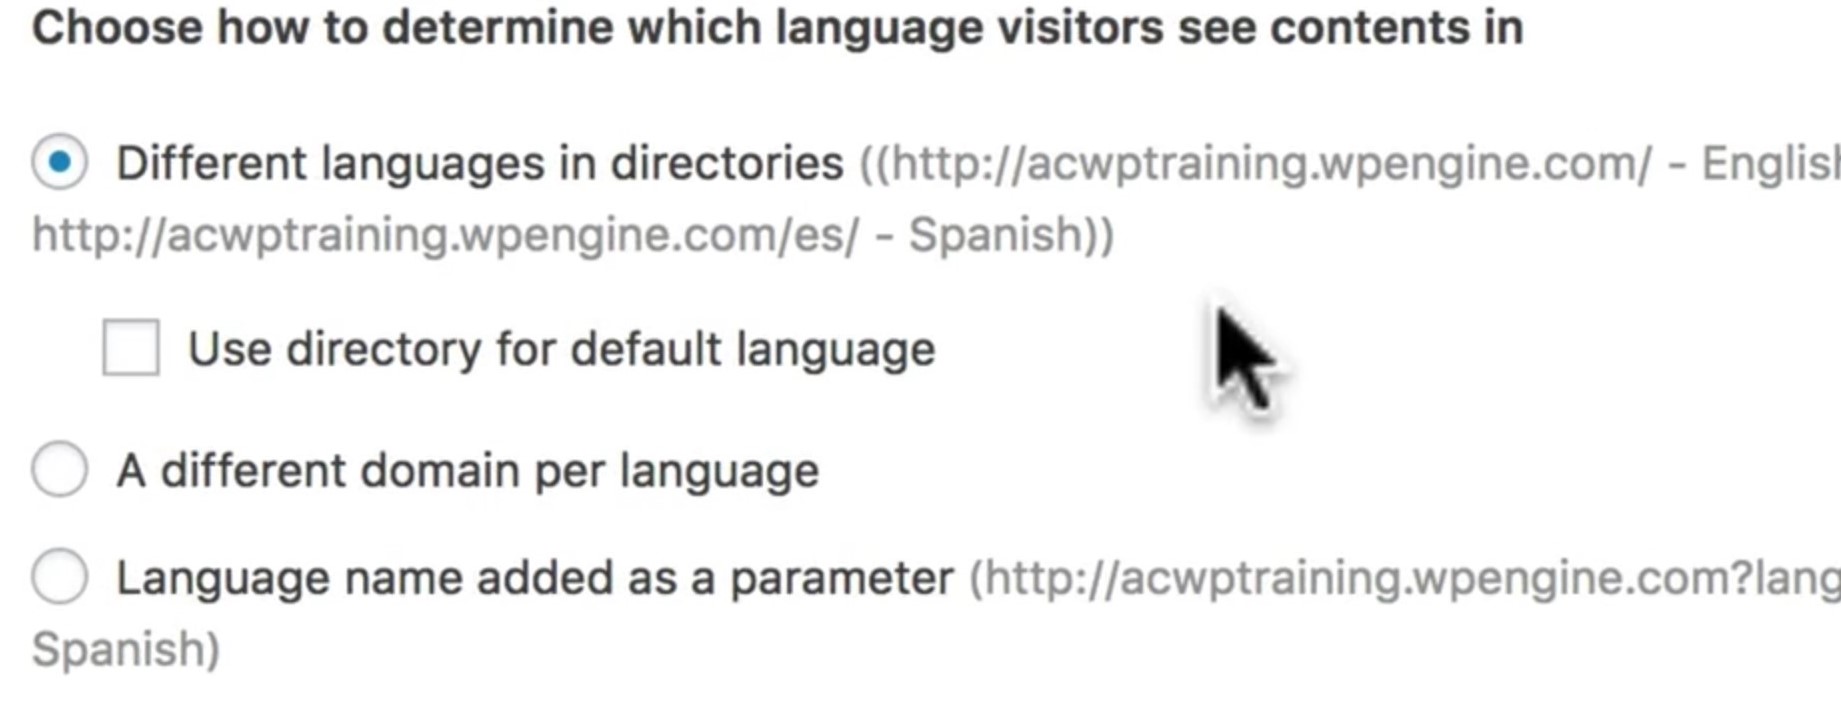
WPML lets you determine the language users will see when they visit your website. You have three options:
- Offer different languages in the directory
- Offer a different domain in each language
- Use the language name as a parameter
Let’s dig into the positives and negatives of each choice.
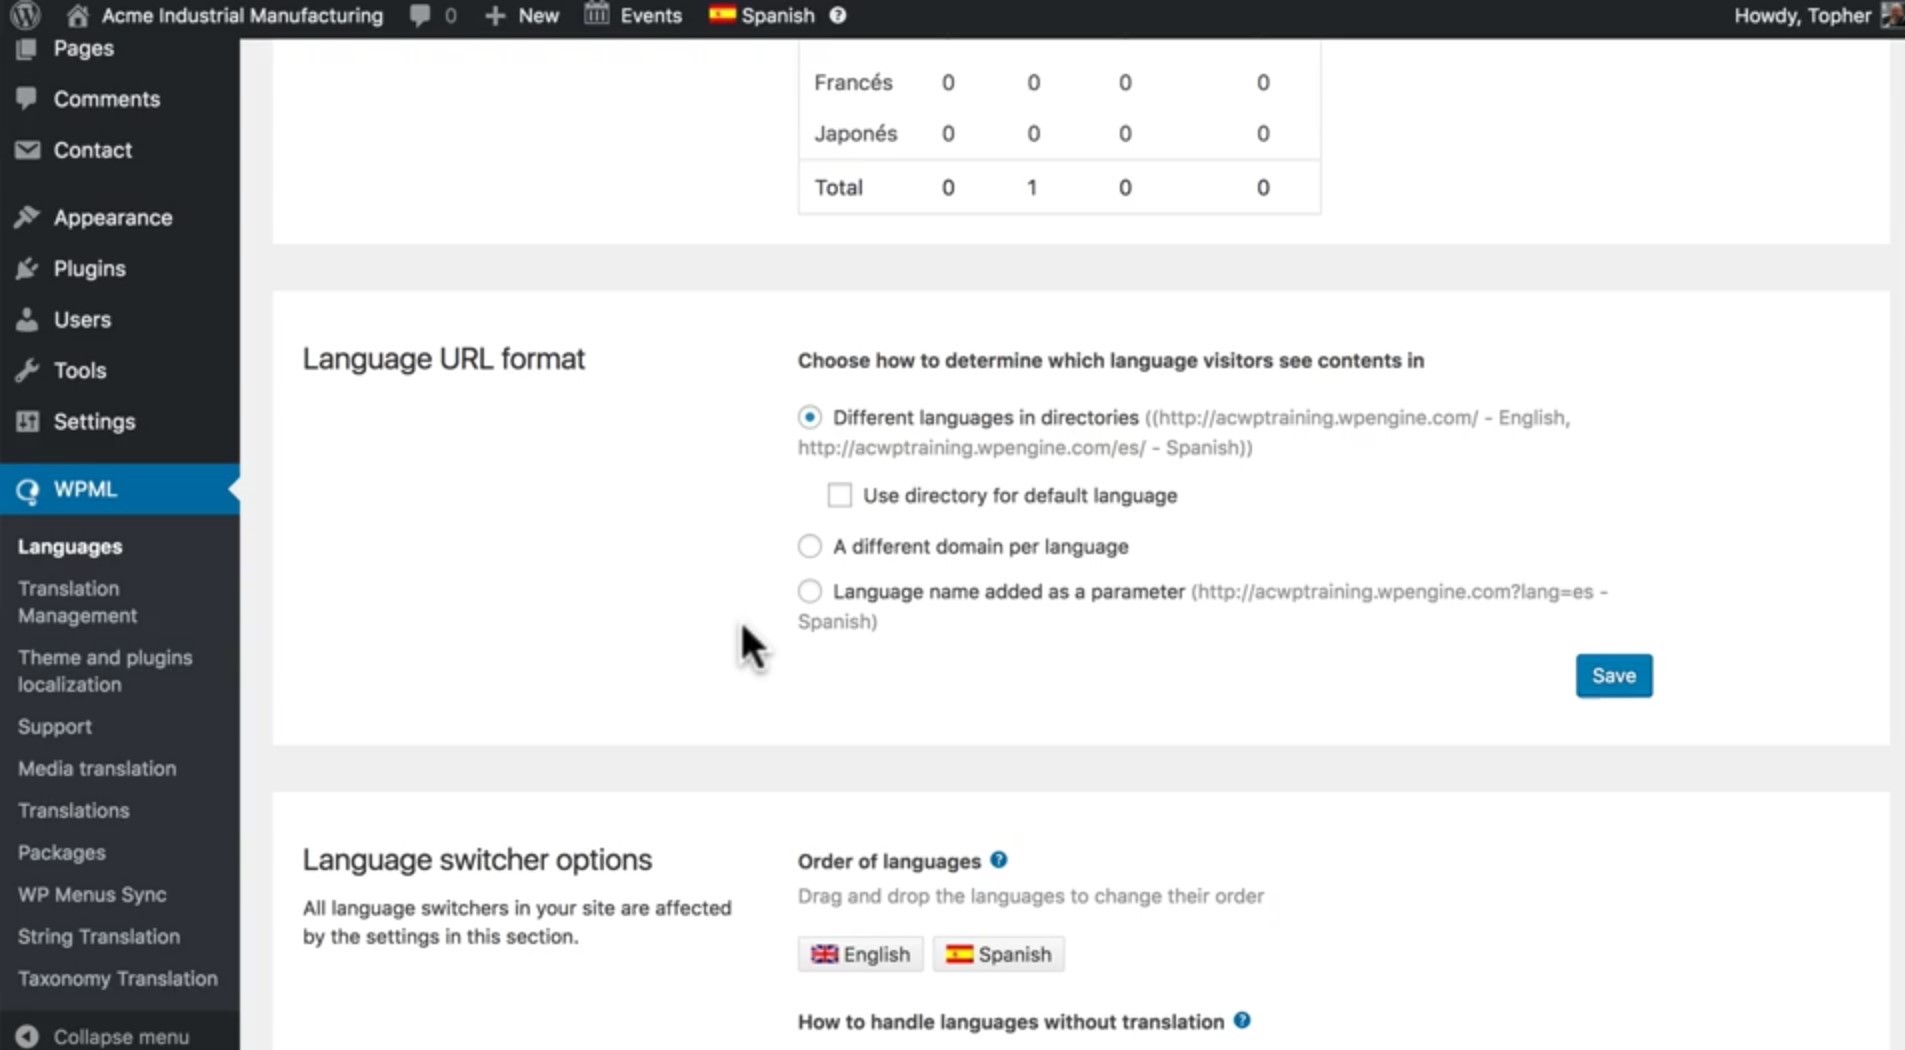
Option 1: offer different languages in the directory
Most likely, you’ll want the main URL to be in English, so you’ll set English as the default language. When it comes to giving users access to other languages, you simply add “/xx/” to the main URL.
For example, to make Spanish the main language using a URL, change the URL to “www.Example.com/es/.” This will lead users to the Spanish language page, while still working from your company’s main URL. This is our preferred method.
Option 2: offer a different domain for each language
This option works fine as far as Google is concerned, but it can confuse people who might be interested in seeing your website in more than one language. They will have to visit two different URLs to do so, which is not user-friendly.
However, if you don’t think your audience will ever need or want to access multiple languages, then having a different domain for each language is an option.
Option 3: use the language name as a parameter
To be perfectly honest, we don’t suggest this option. When you add a language as a parameter, it creates a very strange URL. It looks something like this: “www.Example.com/?lang=es.”
That was painful for us to type, and it will be painful for your users to type, too. It’s not user-friendly or a professional way to present your brand to the world. Additionally, those parameters don’t communicate to Google that this is the Spanish version of the site, which can lead to trouble down the road.
From a user’s perspective, “Example.com/es” looks much cleaner than “Example.com/?lang=e.” That’s why we strongly suggest you steer clear of parameters.
Step 8: translation management
Now that you’ve set up a WordPress website with WPML plugin to handle translations, it’s time to translate content. Your chosen translator will translate content, then put it in the appropriate place on your website.
Setting up translation documents
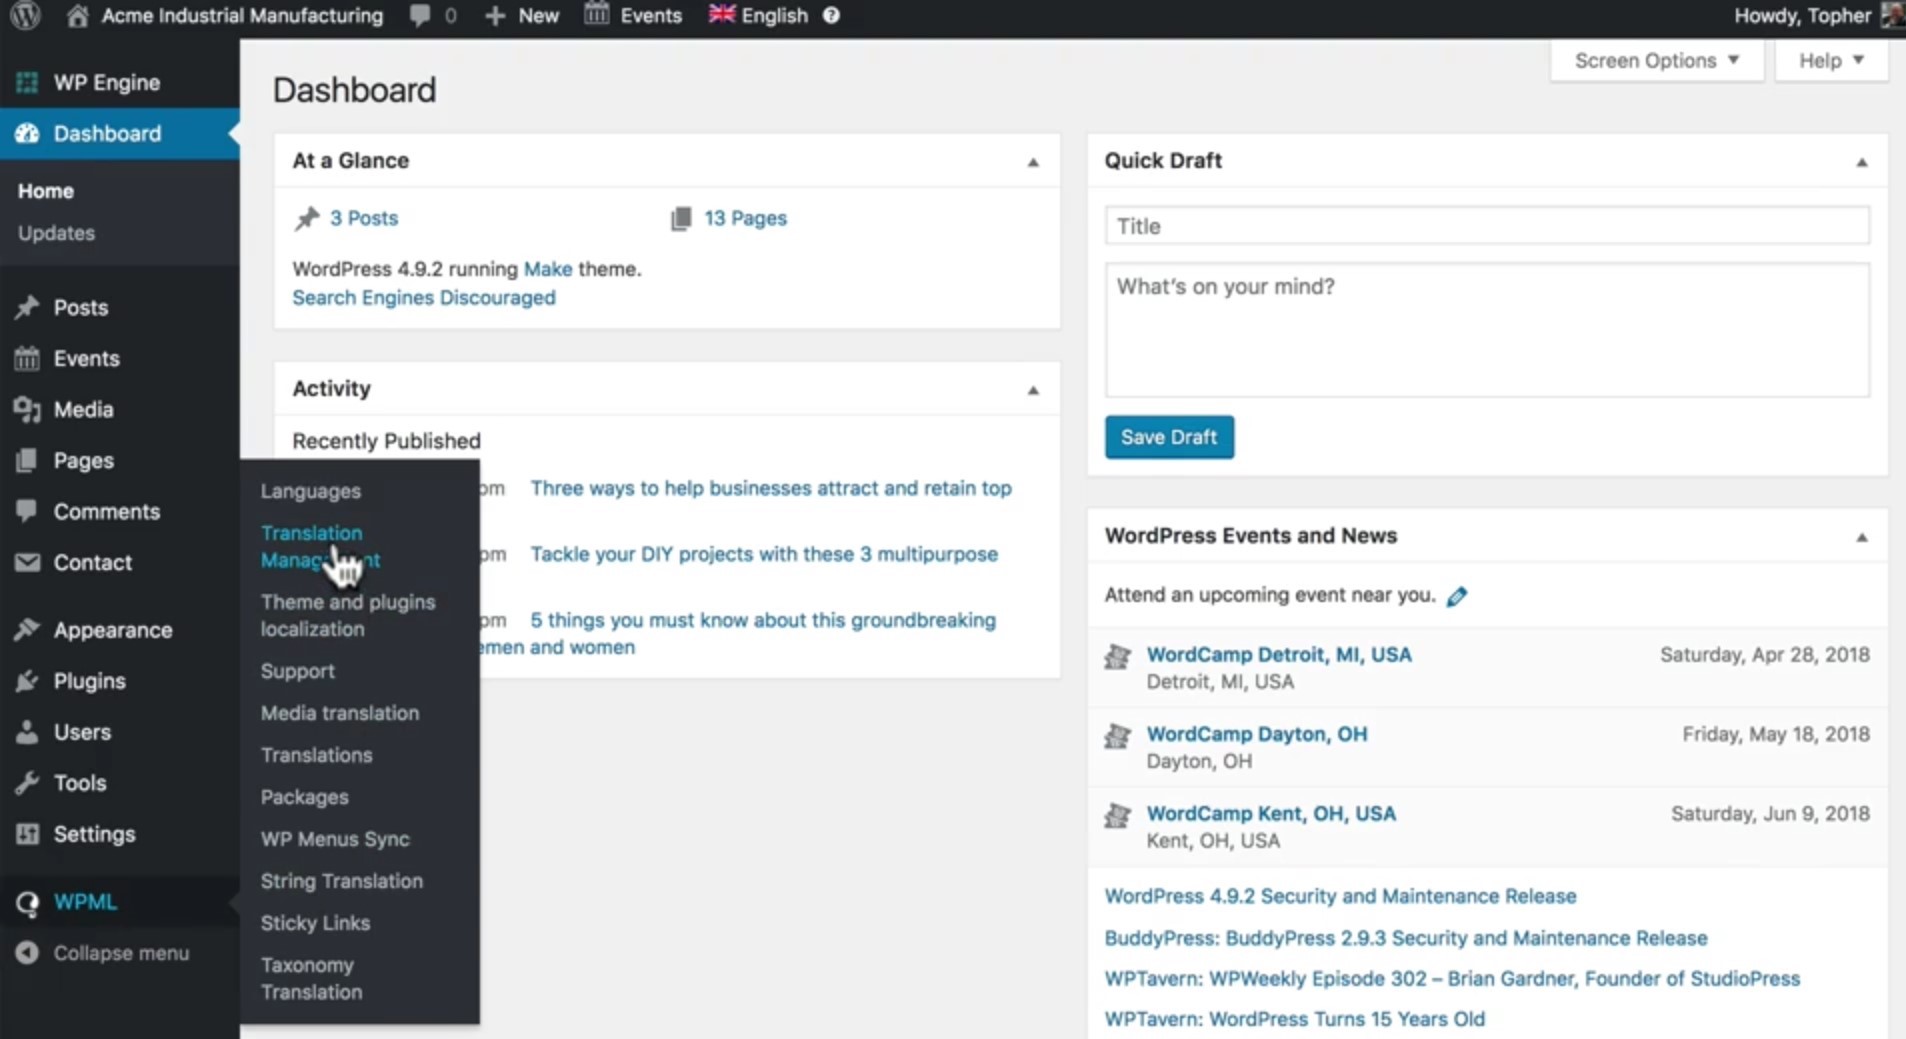
Within your website, the source for all translation management is the “Translation Management” dashboard, a powerful tool provided with your WPML plugin. If you don’t have the plugin, you won’t have access to this tool. To get to the dashboard, go to the admin ”Dashboard,” find “WPML” and select “Translation Management.”
Once you’re in the “Translation Management” dashboard, keep all the default settings … except for one: “Multilingual Content Setup.” There’s a good reason to change this setting.
First, go to “Multilingual Content Step,” then scroll down to “Translated document options.” We strongly suggest that you select “Draft” instead of “Same as the original document.” By selecting “Draft,” the content stays in draft form until you approve it, giving you the power to decide when it gets published. If you choose the second option, the document automatically gets published when your translator changes the original content.
Setting up internal translators
If you head back to the “Translation Management” dashboard, you’ll get to choose who you want to be able to translate content. It should be anyone you trust with access to your website and with translations.
Simply click the “Translators” tab under the “Translation Management” dashboard. Then, choose the language you want to translate. For example, if you’re translating English to Spanish, you’ll get a list of team members within your website. Here, you can assign people to the languages they’re able to translate.
Now, they can go to the “Translation Management” dashboard and search for the content they wish to translate. For a detailed, step-by-step guide to managing individual projects, watch our video guide.
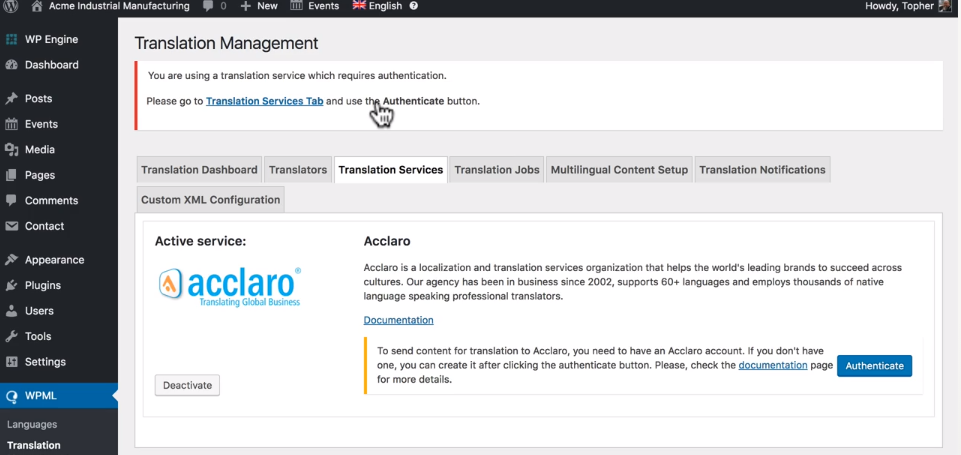
Setting up an external translation service
When you choose an external translation service, be sure to restrict behind-the-scenes access to your website. The same goes for internal team members you’d rather not have access to content.
We’ll use Acclaro and our talented team to walk you through the right way to connect to an external translation service.
To set up an external translation service, head back to the “Translation Management” dashboard. From there, select “WPML” and click on “Translation Management.” Once you’re on this page, you’ll notice a tab at the top called “Translation Services.” This is the conduit to your external translation team.
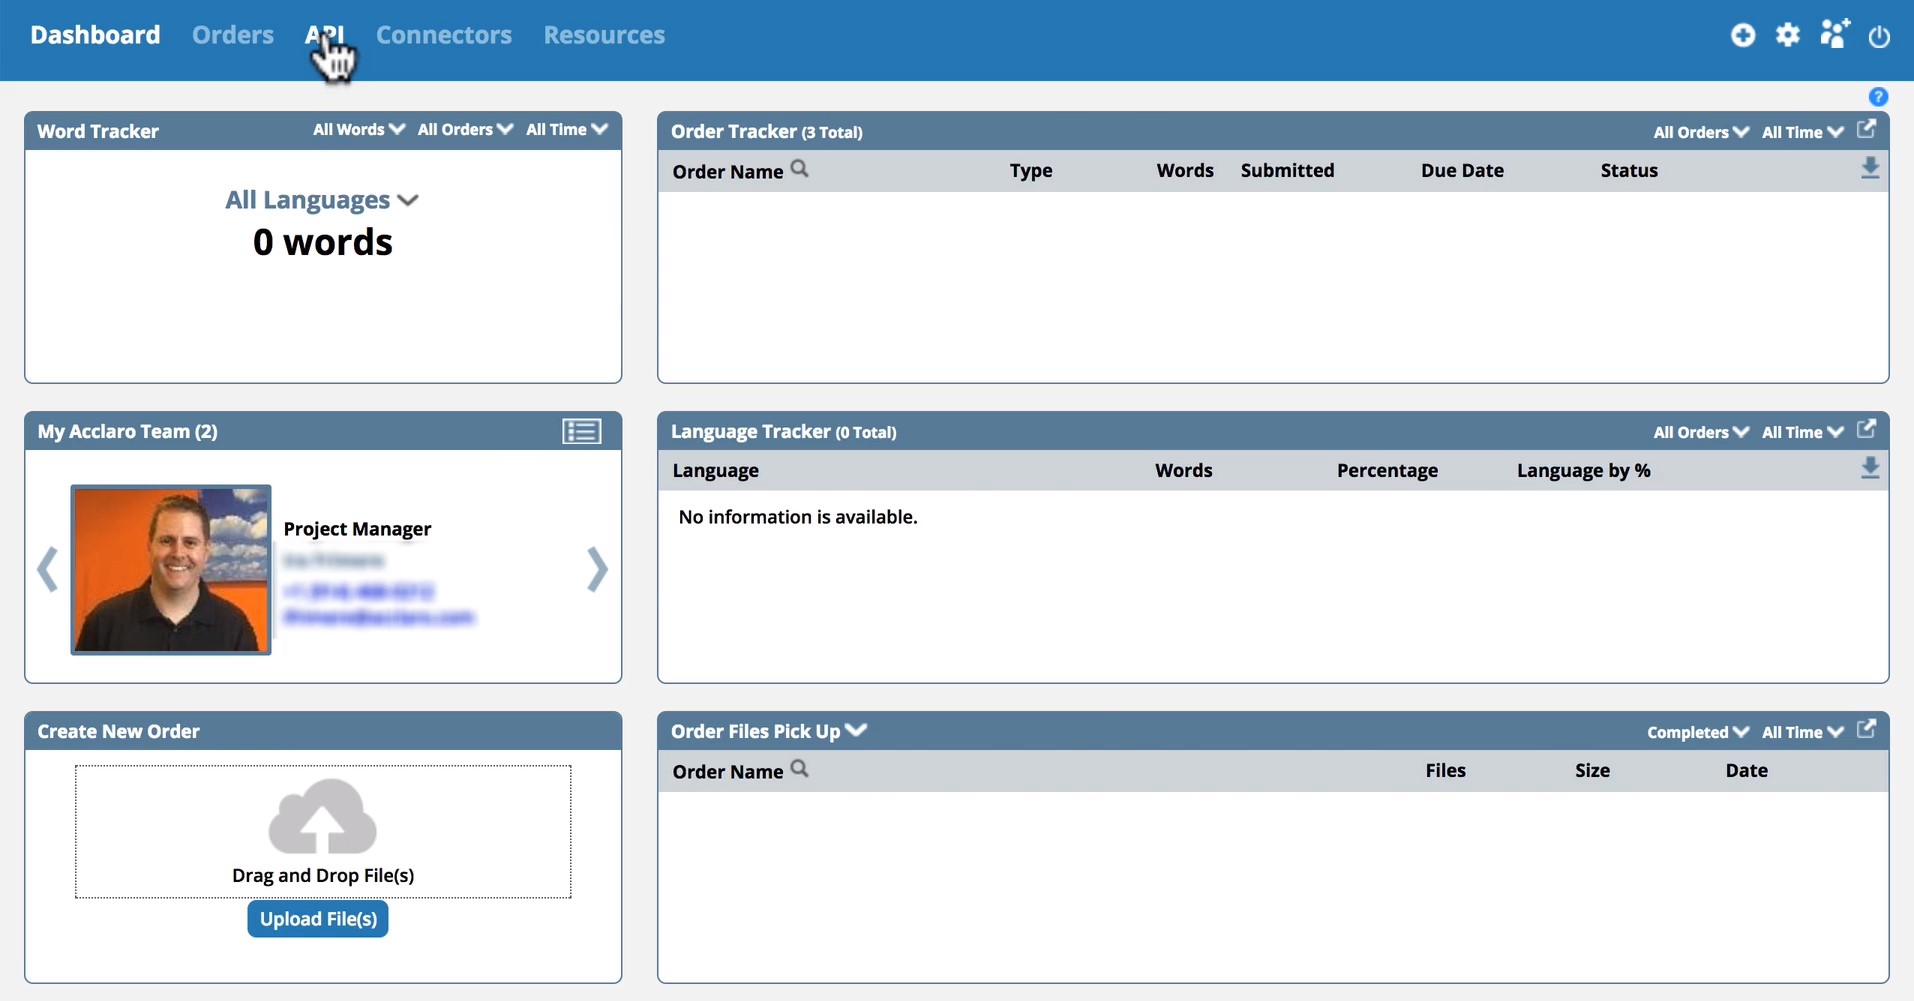
To get set up with us, open a new window and go to our login page. You can log in to our dashboard here, but be sure to keep your website open in a different window so we can go back to it. Once you have an account with us, you can see existing orders, language tracker and order files. If you just signed up, there won’t be visible projects.
However, you’ll need to authenticate us as your translation service from this page. To do so, click “API” at the top and then “Token” from the top navigation bar.
Copy the token, go back to your website’s “Translation Management” dashboard (still open in the other window) and click the “Authenticate” button. Paste the token into that field, and you’ll be connected.
Step 9: integrating with Acclaro
Now that you’ve connected your WordPress website with the WPML plugin to our website, we’ll show how to get the most out of it by maximizing your integration. As an example, we added one piece of content to show you how to manage it.
How to send a translation job to Acclaro
Start by heading over to the “Translation Management” dashboard.
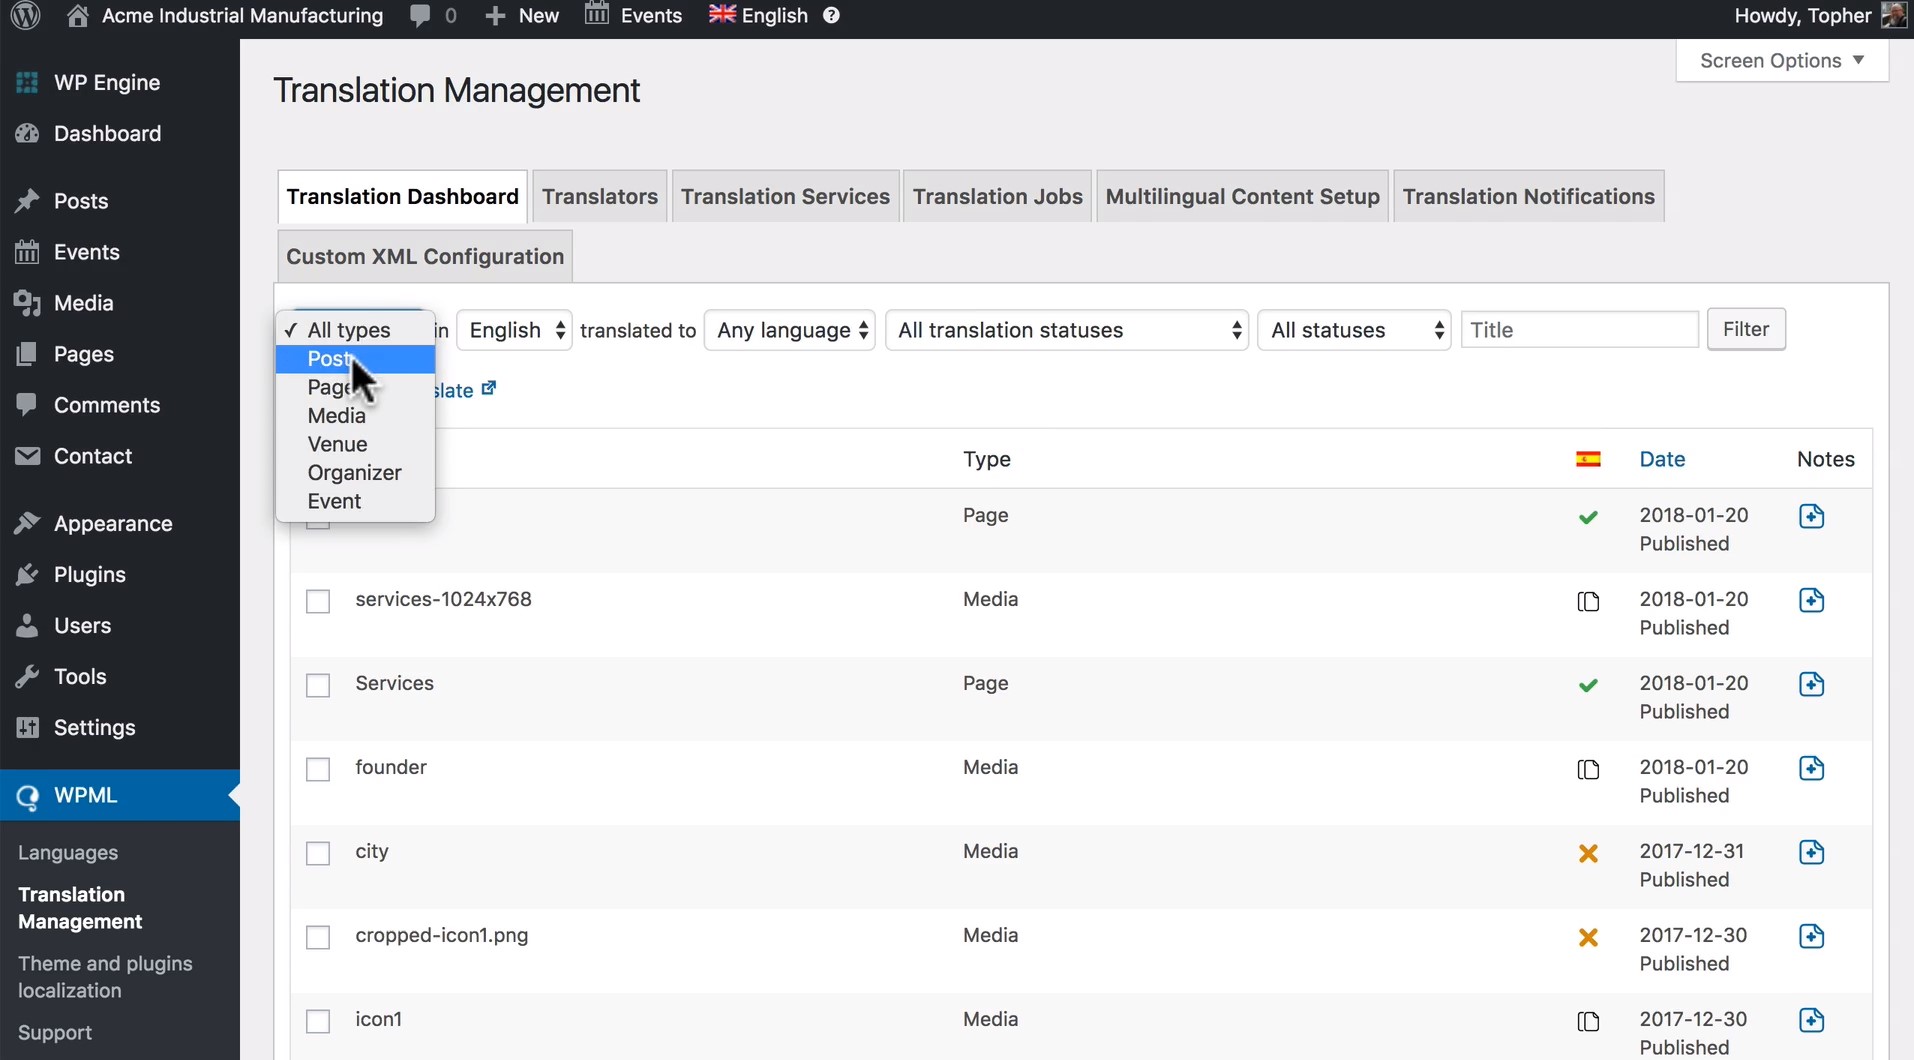
By default, the open tab is “Translation Dashboard.” From the dropdown menus near the top of the page (“All types,” “English,” “Any language,” etc.) select the content page you want to translate. It could be a single post or an entire page.
Once you choose the content page, click “Add to Translation Basket.” This section holds all the content you need translated, kind of like a to-do list.
Now go to “Translation Basket,” the tab at the top of the page, and scroll down.
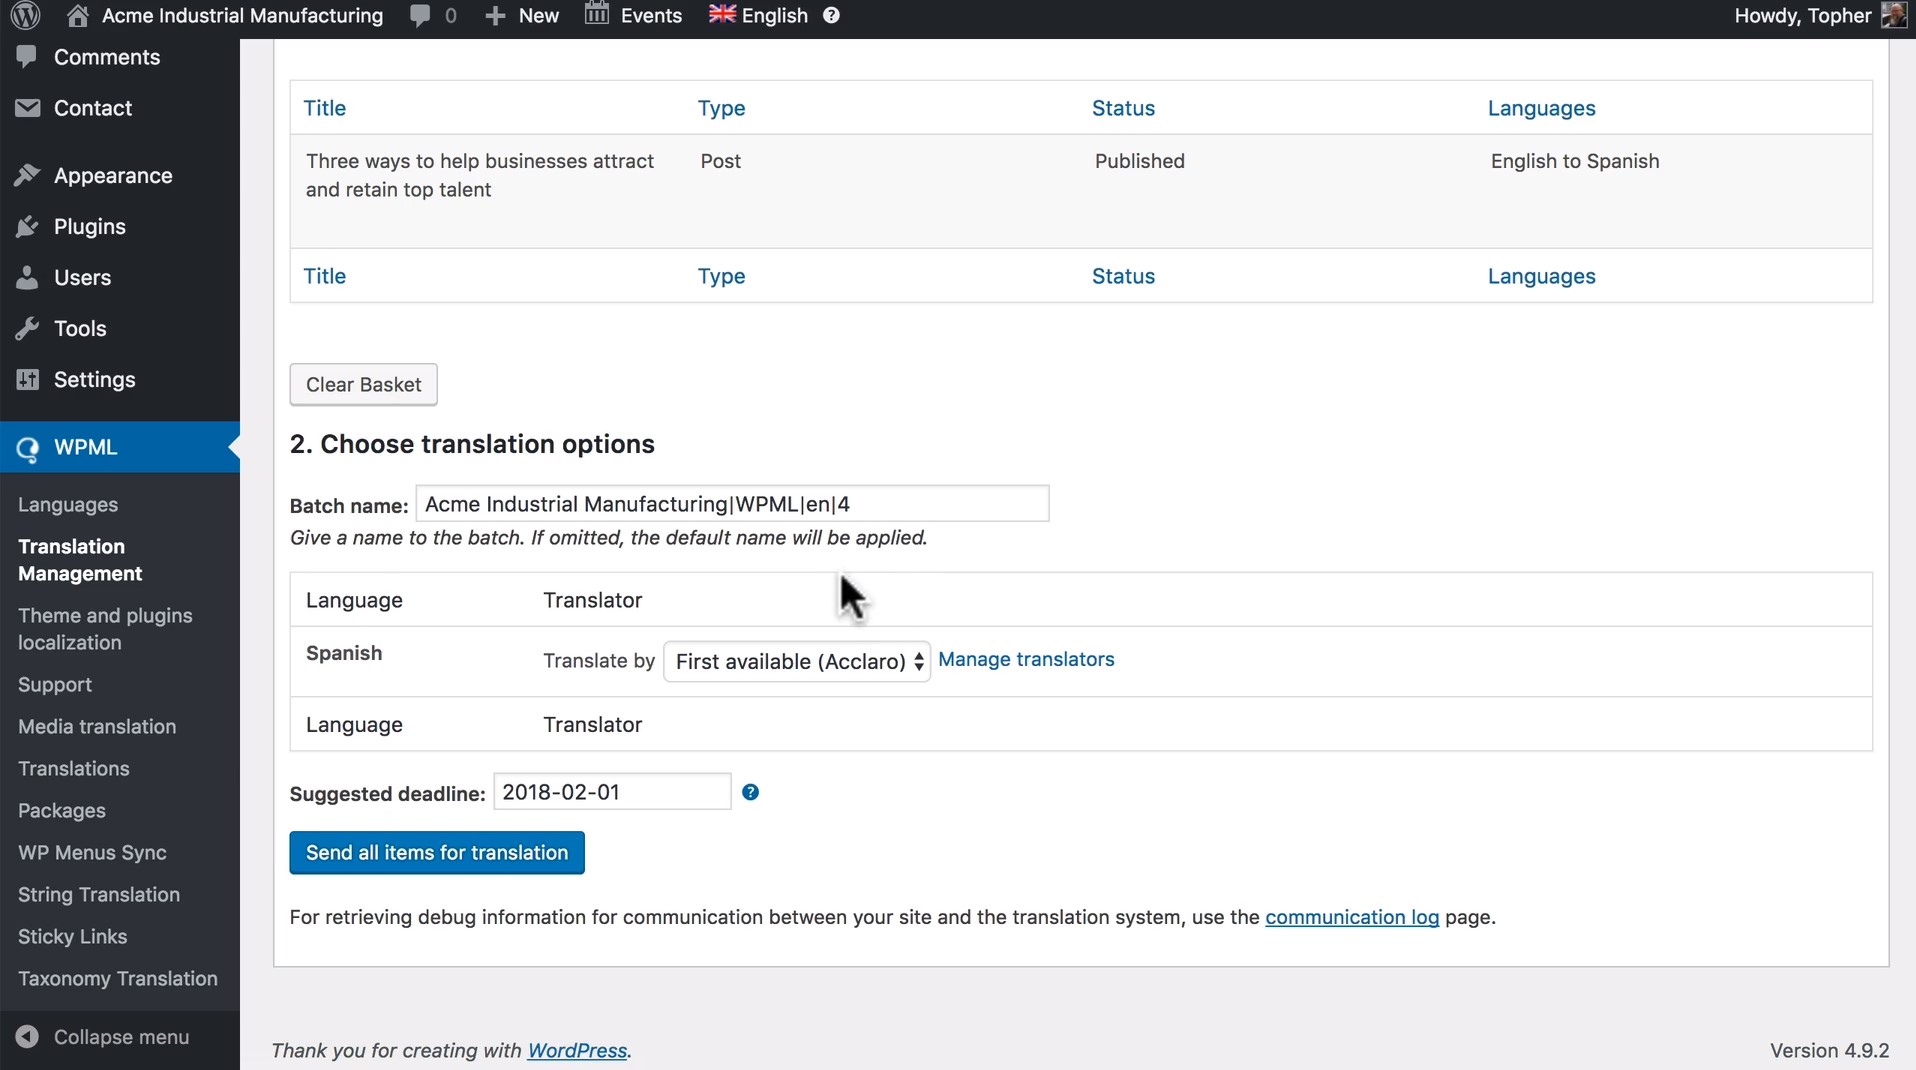
There, you can choose an external translation partner. In this case, select Acclaro in the “Translate by” field. Then, choose the desired deadline and click “Send all items for translation.” Acclaro will immediately receive the content to be translated.
Once you send your job to be translated, there are three ways to check on a its status:
- Go to the “Translation Jobs” tab at the top of the “Translation Management” dashboard and click the “Synchronize status” button
- Log on to your My Acclaro dashboard
- Wait for an email alerting you when each job is complete
What to do with a completed translation job
In a previous section, we suggested you keep translated jobs in draft form instead of publishing them automatically. Doing it that way allows you and your team to review each job before the content goes live.
Each time we complete a translation job, it’s sent to your WordPress site and can be accessed through the Admin dashboard. For example, if you send us a post to translate, you’ll receive an email once the translation has been completed. After that, you can go to the “Post” section of the Admin dashboard and review the content. You can edit and publish it on your own.
The wonderful thing about this process is that Acclaro never has access to your website. In fact, it’s all done using technology. WordPress and the WPML plugin send your translation job through an API to an Acclaro professional, who translates it and sends it back to your website through the same API.
Step 10: a review of creating translation-ready website content
At this point, you’ve created a WordPress website with the WPML plugin. You’ve chosen a theme and plugins. You’ve connected your website to Acclaro to take advantage of our professional translation services. And now, hopefully, you’re getting professional translation via the magic of technology.
Now it’s time to review the entire process of creating a multilingual WordPress website. Use this tutorial as a handy cheat sheet to help you achieve seamless translations, while representing your brand in the best possible way.
Internationalization vs localization
Internationalization uses coding best practices to allow a website to be translated. Ideally, this is created by an experienced programmer.
Localization, on the other hand, deals with the actual process of translating. These translations can be done by multilingual marketers and professional translators.
Themes, plugins and alt tags
When choosing a WordPress theme and plugin for a multilingual website, make sure they are internationalized. If they are, they can be localized using the WPML plugin and your chosen translator.
You’ll also want to make sure your site has the proper alt tags to indicate multilingual content. These tags let Google know that the duplicate content is intentional and due to being translated in multiple languages.
Professional translation services
Remember, you don’t have to provide website access to your professional translation and localization service. If you followed our instructions and set up a multilingual website correctly, you can let technology do the work for you. If you partner with us, all you have to do is post a translation, send it to us to translate, sit back and review the finished product. We give you high-quality, prompt translation you can trust using a secure website interface.
You’ve taken the first steps toward a successful multilingual journey! If you have any questions or need professional translation services, don’t hesitate to contact us. Thanks for reading, and good luck!
Insights for global growth